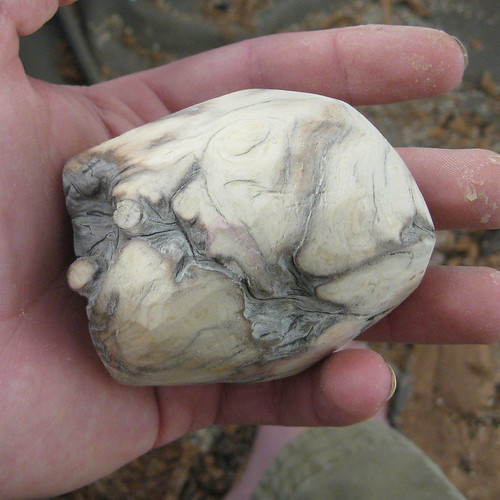
For this piece, we're starting with a piece of black spruce burl that i collected on the shore of the Bering Sea this summer. Once I actually decided to carve it, the first step was to trim off the two protruding branch ends with a hand saw. Then it was hand shaved with rasps into a workable shape, removing nearly all of the weathered, grey exterior.
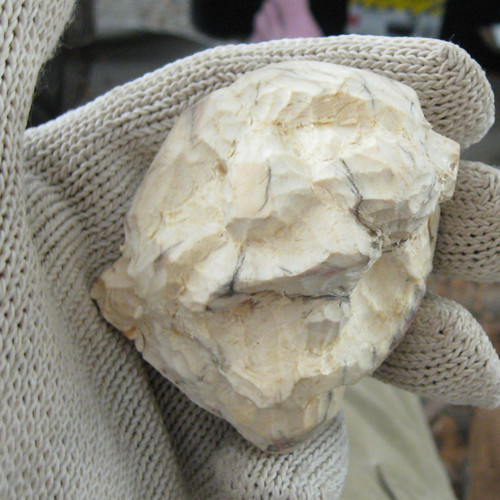
After that, I started cutting into it with my gouges in what felt like the right place to start. I almost never plan out my carvings, I just start cutting into the wood and try to help whatever wants to emerge do so. Before long, I had the basic shape of some kind of face.
Then it was a matter of refining and adding a little detail. This burl has grain running in 15 different directions, sometimes in the same place...
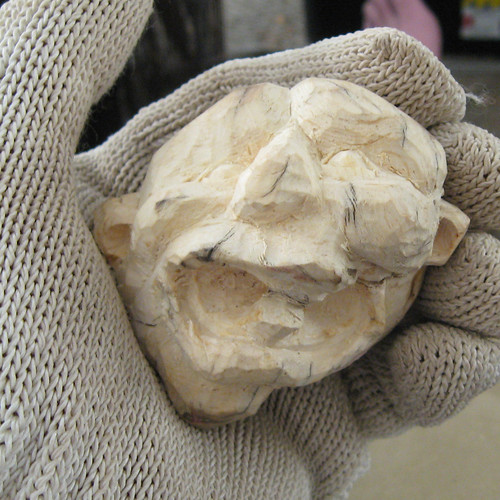
Refine further, file, sand; repeat.
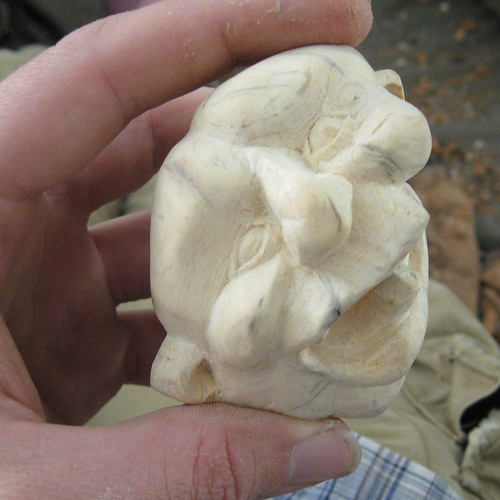
Add Danish Oil, let it soak in.
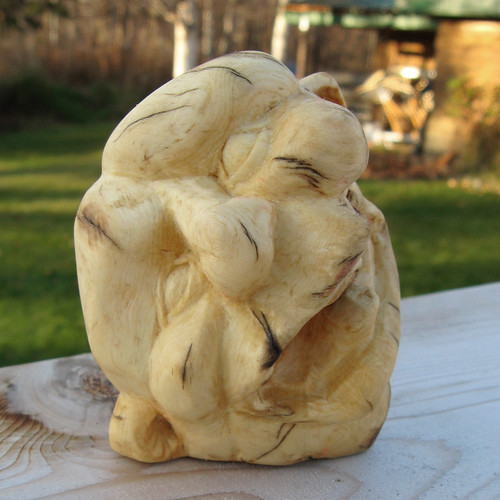
Last but not least, put it out there for everyone to see and hope they like it.
http://www.etsy.com/view_listing.php?listing_id=32796599
I've gotten some feedback that it's difficult to make out the shape in the photos on Etsy, can anyone back that up or add any input? please?


Nope, no difficulty, looks awesome, reads just fine in the photos.
ReplyDeleteReally niece piece, like it a lot.
-t
Thanks. I was beginning to think that I was only having an easy time seeing it because I knew what I was looking at.
ReplyDelete